
Table of Contents
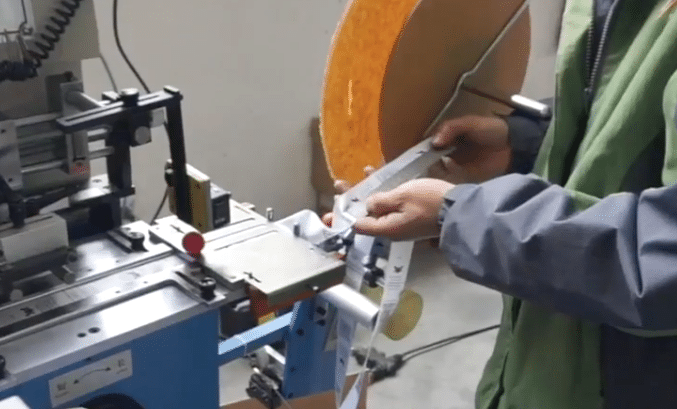
For each label cut and fold machine operators, we must clearly know procedure of label length setting. We may need to use mark tracer to treat printed label jobs. So let start the procedure in details.
Note: Follow procedures are for Printed labels. while for woven label, we shall use woven label pusher. We just need to set label length. We will not use mark tracer.
LABEL LENGTH SETTING
Operation Procedures:
- Measure label length;
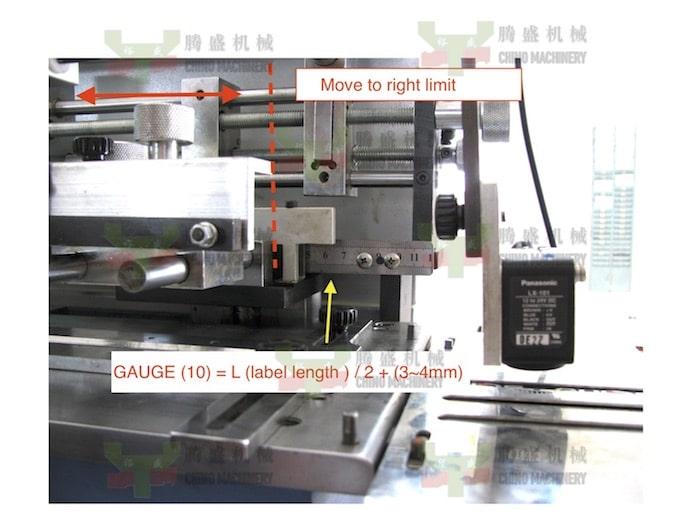
For any woven or printed labels, there can be some errors of section length. We’d better measure more pcs of label length on the roll. Then we take the average as target label length. Our label feeding system will compensate such errors. for YS-3000, 4000, 5000 series machine, length correct system is by a limit switch + mark tracer. - Push INCHING button to move push to most right side;
It is some difficult to make pusher to exact limit. Just about will be ok.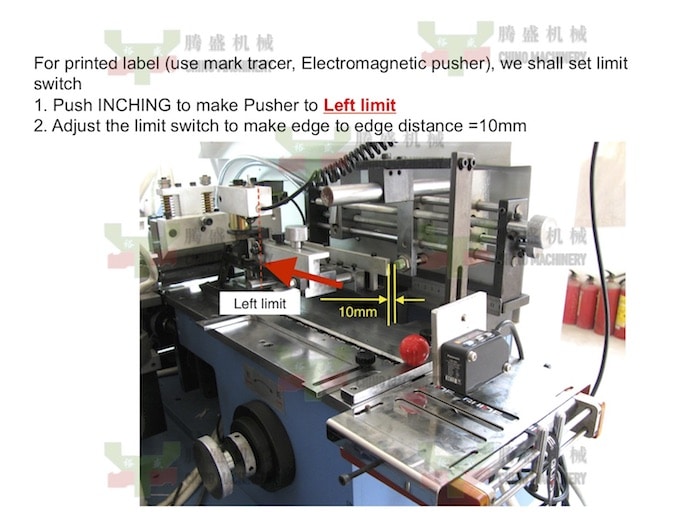
- Unlock length adjust handle and adjust label length;
Gauge Length = [label length] / 2 + (3-4mm)
After we set label length, some time we can find that label cutting became shorter and short or bigger and bigger. It means length setting is smaller or longer than actual. We can try to do small adjustment and check again.
- Push INCHING button to move most left side;
Under this condition, pusher will push label cut line under cutter.
For woven label, we shall loose pusher fix screw to move pusher and try best to make pusher as close as possible to the cutter. At same time, we shall be careful to avoid cut on pusher to damage parts and machine.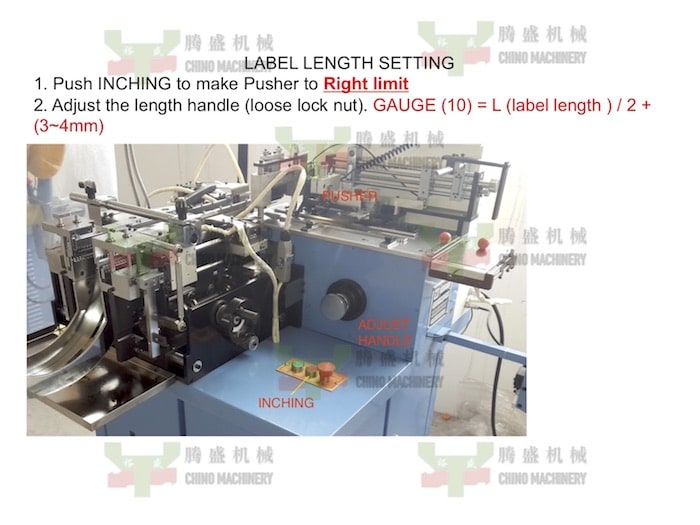
- Set limit switch for Printed label [Not needed for woven labels]Turn the handle of limit switch to make the limit switch about 5mm~10mm away from pusher metal. This range is according to blank area before marker. If blank area is small, we need to reduce it smaller.
- [Go to procedure of Mark tracer setting]
MARK TRACER SETTING
When label length set is ready, we will go on with mark tracer setting. We shall check our labels first and try to find “MARKER”. The mark shall be clear and easy to identified. There shall be enough blank area before the mark. As we know that label length can have errors, so we give some range for machine to find next label. 
Procedure:
- Press EE.Switch button to turn on mark tracer;
- adjust mark tracer holder height and angle to get clear and sharp light spot;
- Manually move label 1st cut line under cutter;
- Adjust position of mark tracer light spot on mark and Press EE.Test button;
- Move mark tracer light spot on blank area and press EE.test button again;
Now setting is done.
NOTE:
- Some customers may knew Panasonic LX-101 mark tracer and has some experience on setting on it. BUT anyhow, please follow our above guide for operation. DON’T do any setting by buttons on LX-101. It will avoid abnormal of it.
Our machine are using outside TEACH-IN circuit. - IF, IF by accident, the mark tracer was abnormal by wrong button press. Please follow the guide to reset it.
Method to Reset Mark tracer Panasonic LX-101 - Operation video please check on Youtube
label cutting and folding machine length set method