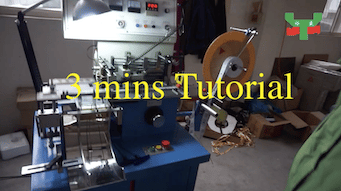
Automatic garment label cutting machine operation guide:
- Loading label
load woven or printed garment labels on unwinder. the method is same to other label cutting and folding machines. - Install electronic magnetic pusher for printed label
for woven label, we shall install woven label pusher. operation is some different. - Mark tracer setting
before start machine, we shall do teach-in for mark tracer.
first, to move mark under mark tracer cursor.
then press orange color button on panel.
then move label blank area under the cursor.
and press the orange color button again.
mark tracer teach-in is finished. - Label length setting
we need measure label exact length.
press INCHING button to make pusher move to right limit.
unlock the handle,
make pointer on ruler to half actual label length plus 3mm. then lock handle.
Press INCHING button to move pusher to left limit.
adjust limit switch to 10mm right to pusher metal. - Try cut and stacking adjustment
before start pusher feeding,
we need not switch on magnetic pusher.
small switch is on top of pusher.
manually push first label under cutter.
at same time, mark tracer cursor shall be on the mark. adjust stacking guide width to label length.
when every setting is proper
we can switch on magnetic pusher.
we shall turn on it only when pusher right moving.
if label stacked position is not proper. we can adjust feeding guide way position to make stacking proper. - Start machine
INCHING button is used during machine setting.
we can start machine by green button.
We can adjust working speed according to performance. for thing and soft labels, we’d better reduce speed to make working stable.
Automatic label cutting and folding machine operation is similar to above procedure for printed labels. we will need set label folding tooling and guiding after cut. the procedure is suitable for pushing feeding structure machine. please refer to following photo of push-feeding and roller feeding difference.


